 ( 001 ) 17-June-2014
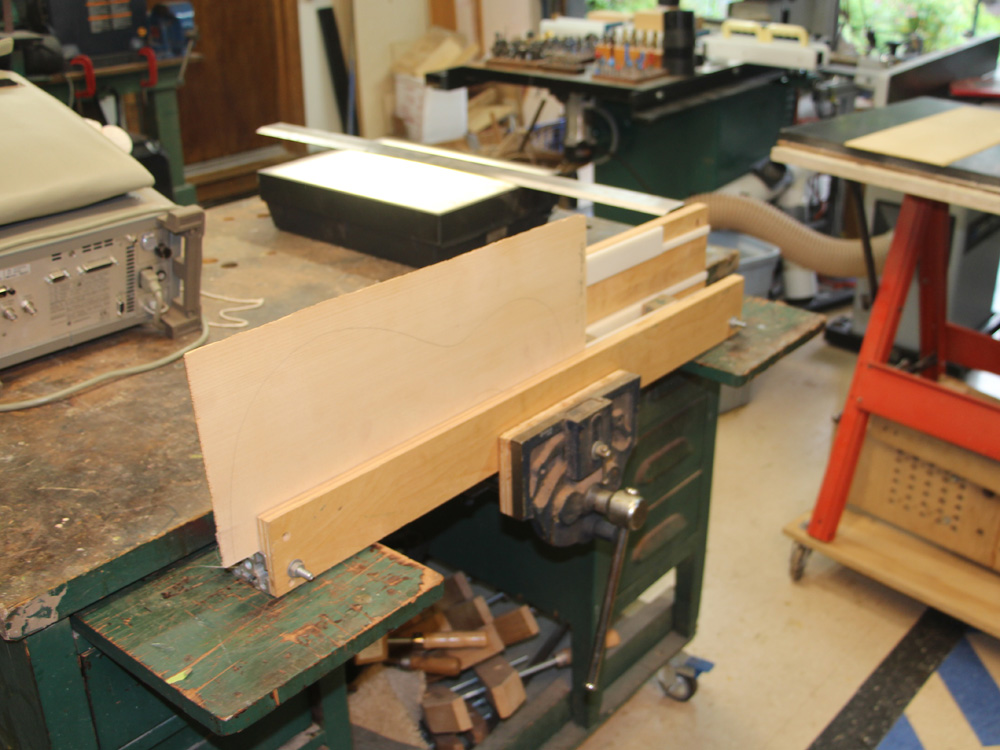
I am starting out building this guitar by joining the two book matched top plates together. In tis picture I am using a jointing tool to make the joining edges straight.
( 001 ) 17-June-2014
I am starting out building this guitar by joining the two book matched top plates together. In tis picture I am using a jointing tool to make the joining edges straight.
 ( 002 ) 17-June-2014
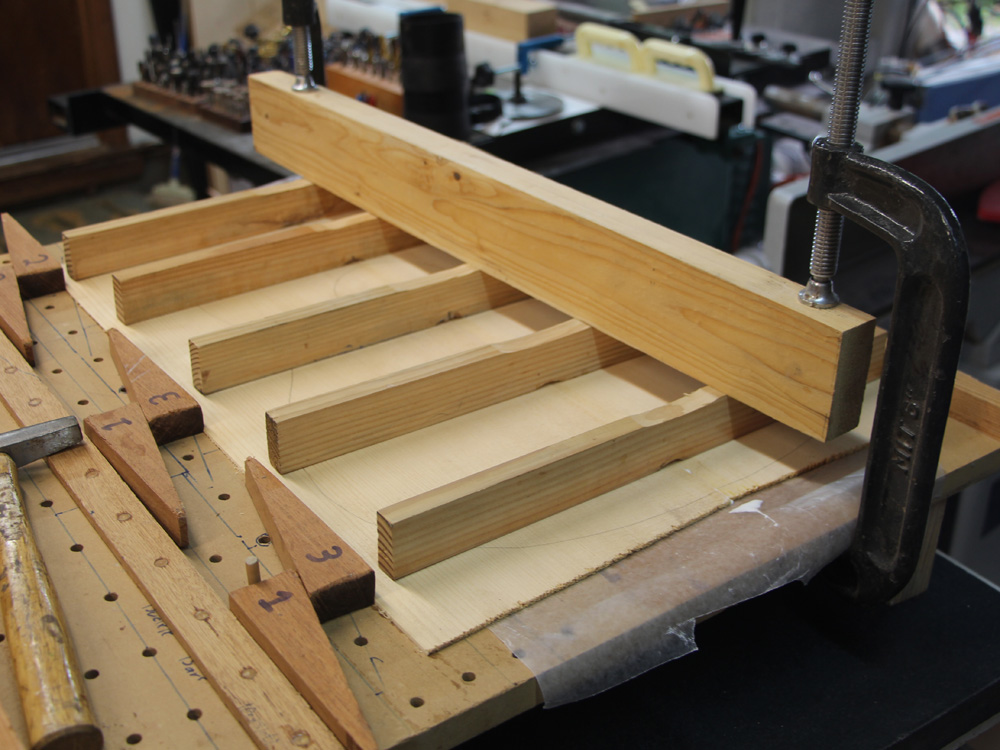
The objective is to create a joint that is undetectable. This tool is used to squeeze the two halves together while keeping them flat.
 ( 003 ) 17-June-2014
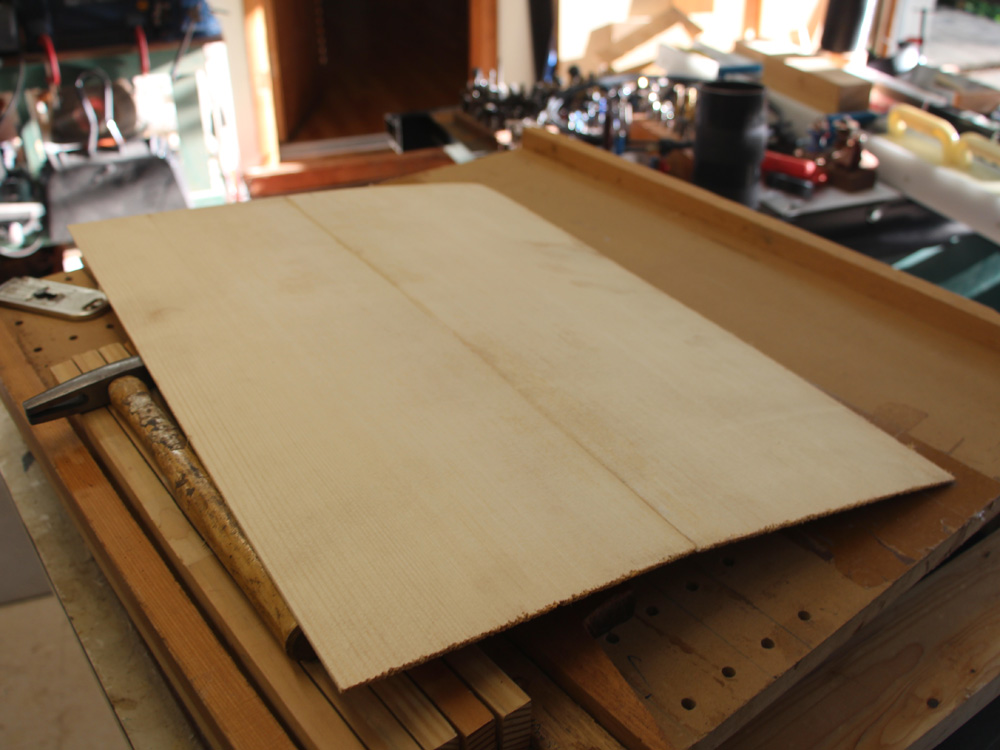
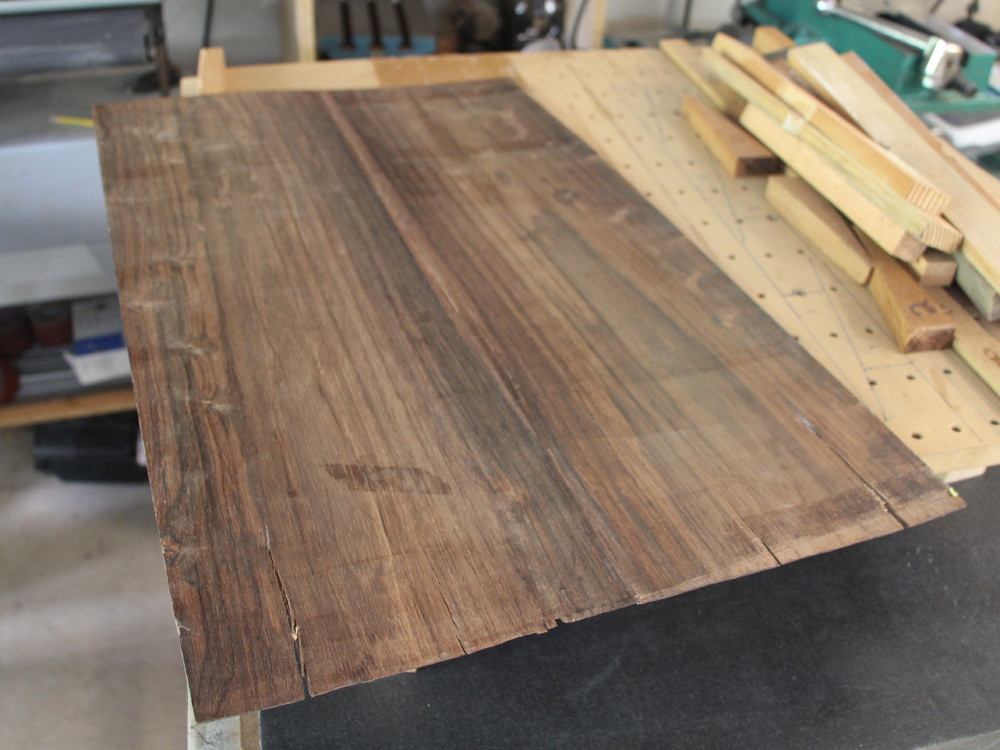
After it has set up I use a scraper to remove the glue squeeze out.
 ( 004 ) 17-June-2014
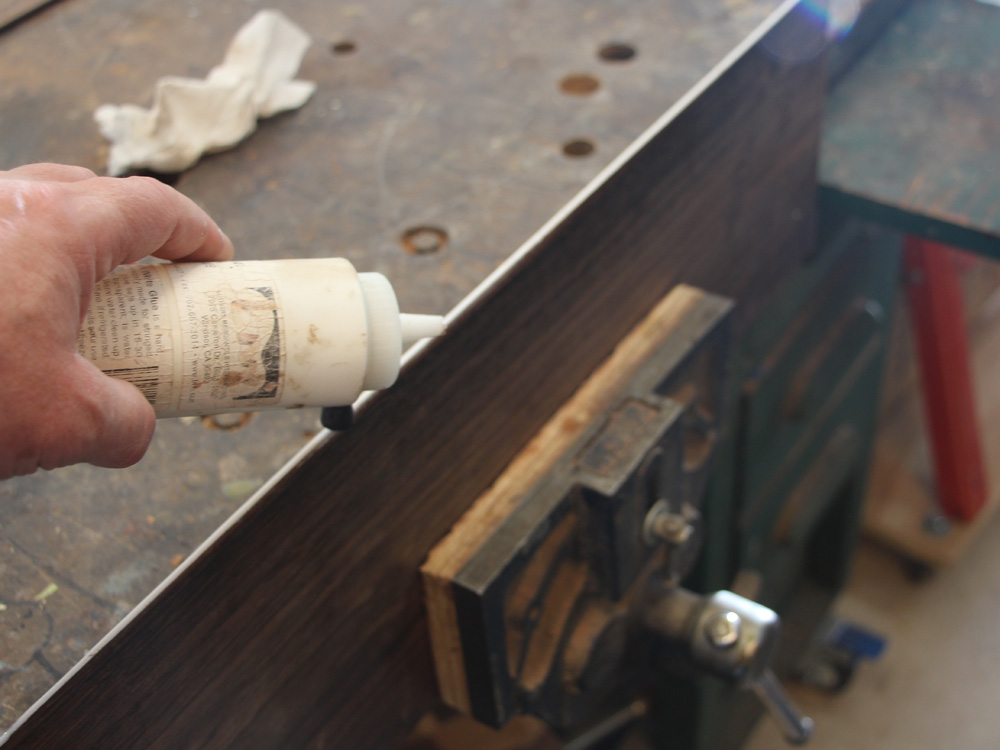
Here I am applying a bead of glue to the edge of the back plate.
 ( 005 ) 17-June-2014
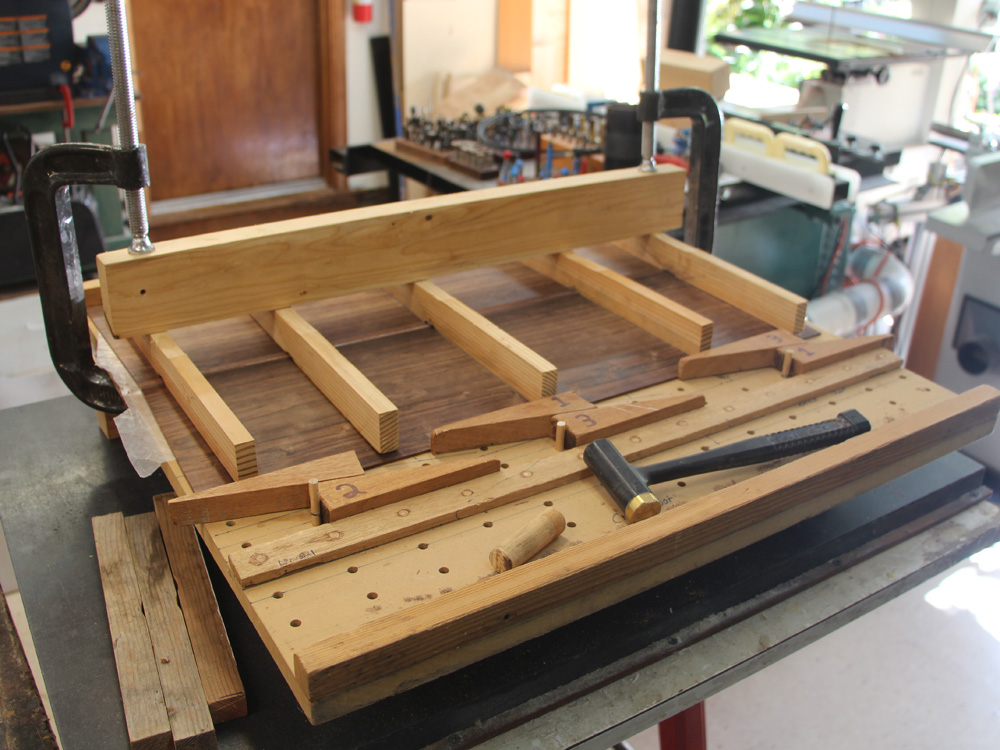
And the two halves are joined in the press box.
 ( 006 ) 17-June-2014
I let it set up over night before pulling it out of the press.
 ( 007 ) 17-June-2014
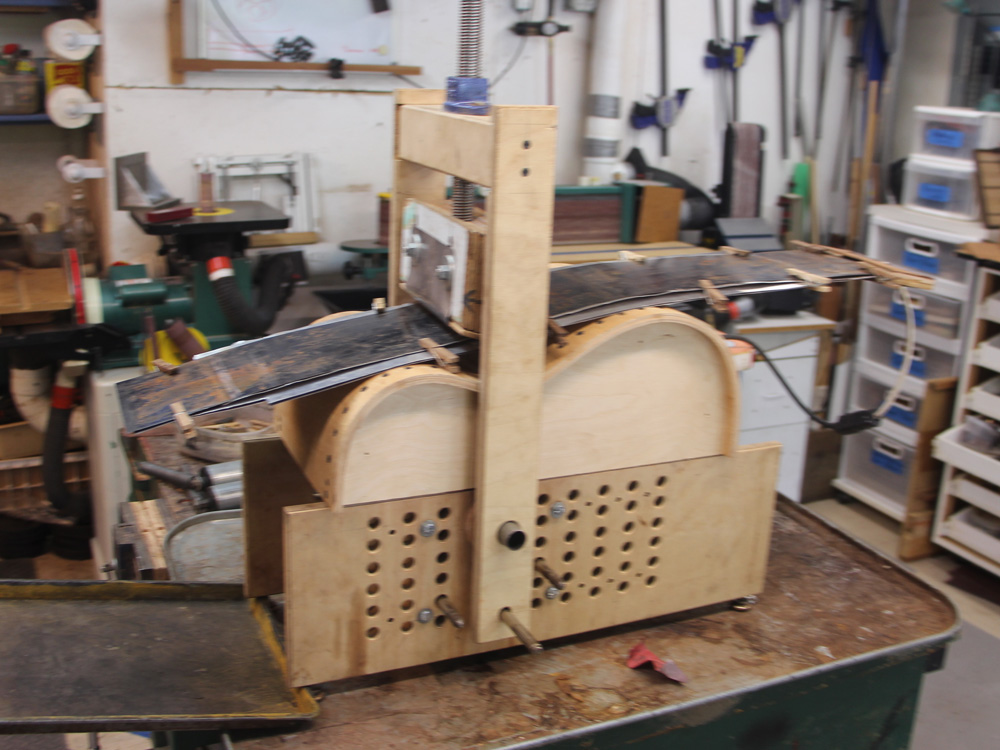
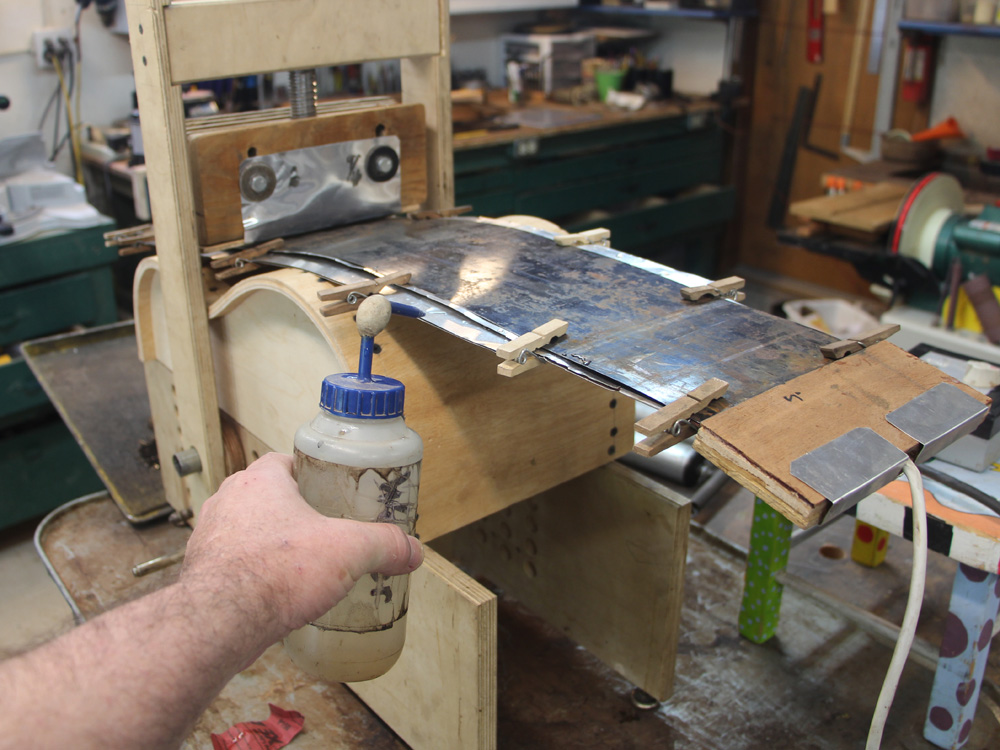
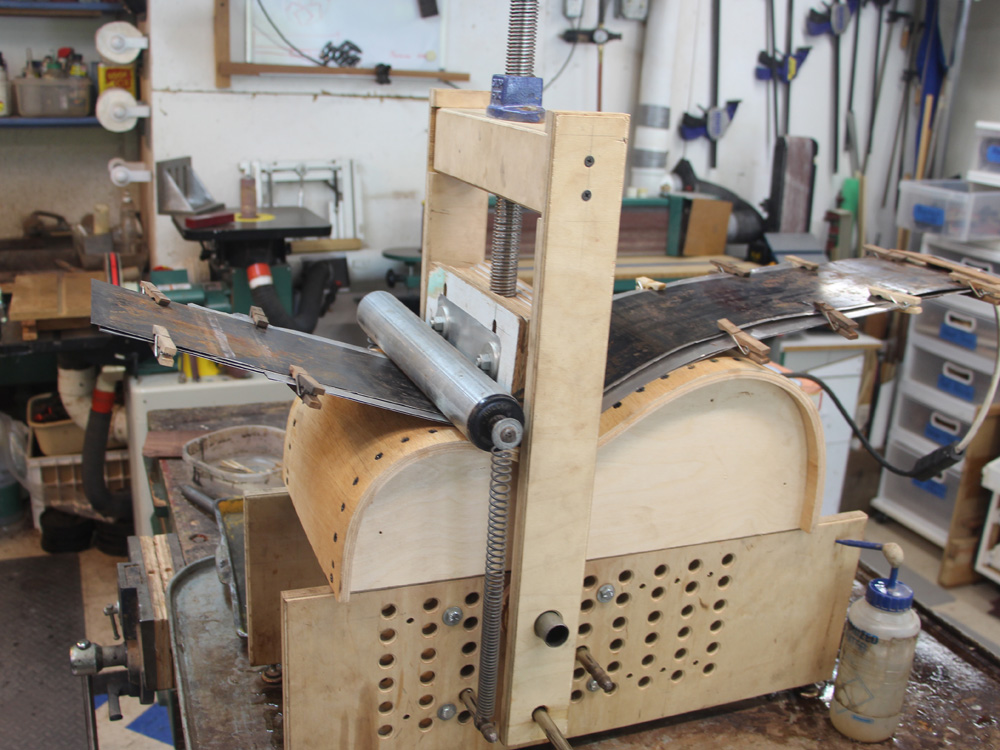
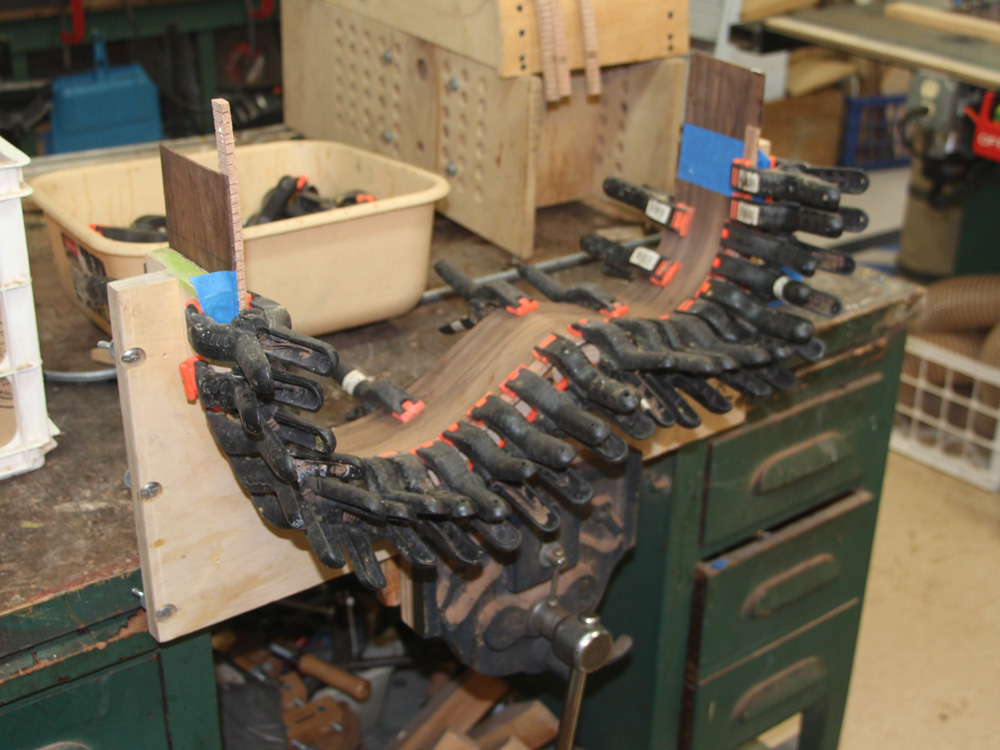
Now I turn my attention to bending the sides. I use a bending press and a heating blanket to do this.
 ( 008 ) 17-June-2014
I put the side piece in the heating blanket with aluminum flashing on the top and bottom and a thin spring steel sheet on top. The spring steel prevent the wood from over bending thereby helping it to avoid cracking. The water I squeeze in between the flashing help to make the wood more pliable as it is heated up.
 ( 009 ) 17-June-2014
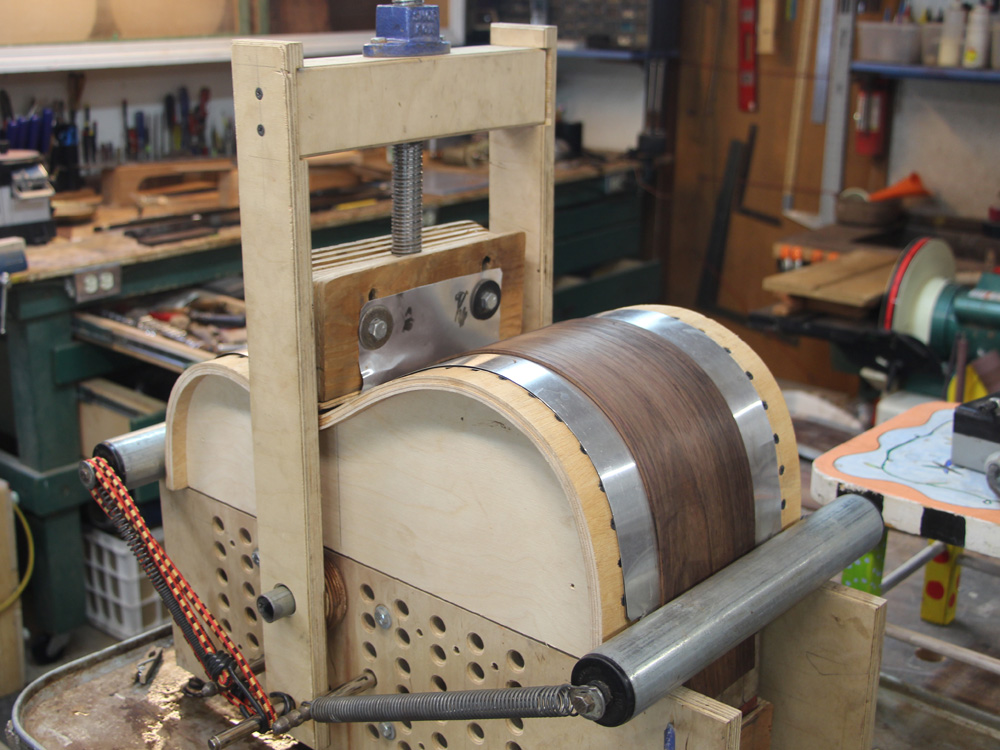
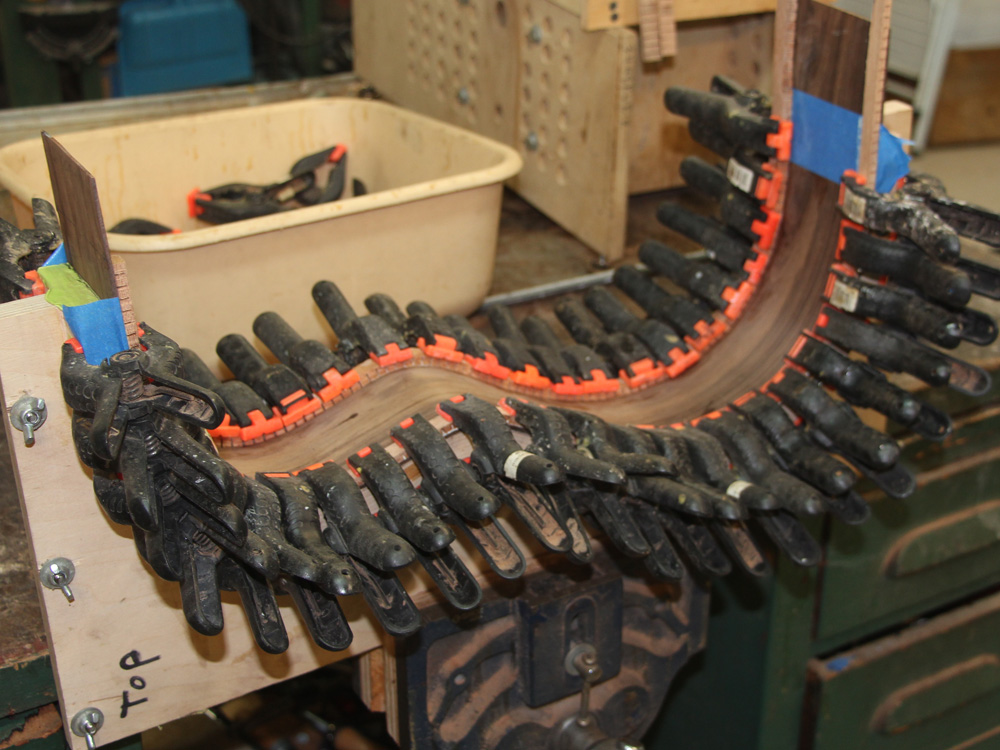
After the wood is ready I first press the waist into place.
 ( 010 ) 17-June-2014
Then I roll the upper and lower bouts into place. Then I remove the top sheets to help let it dry out and set.
 ( 011 ) 17-June-2014
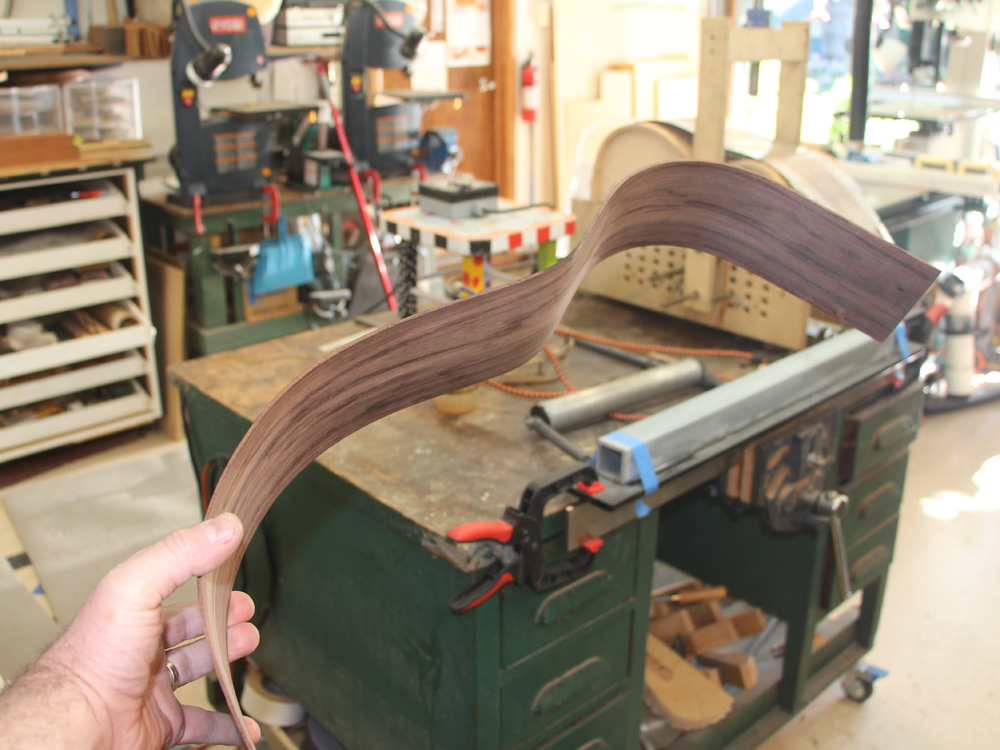
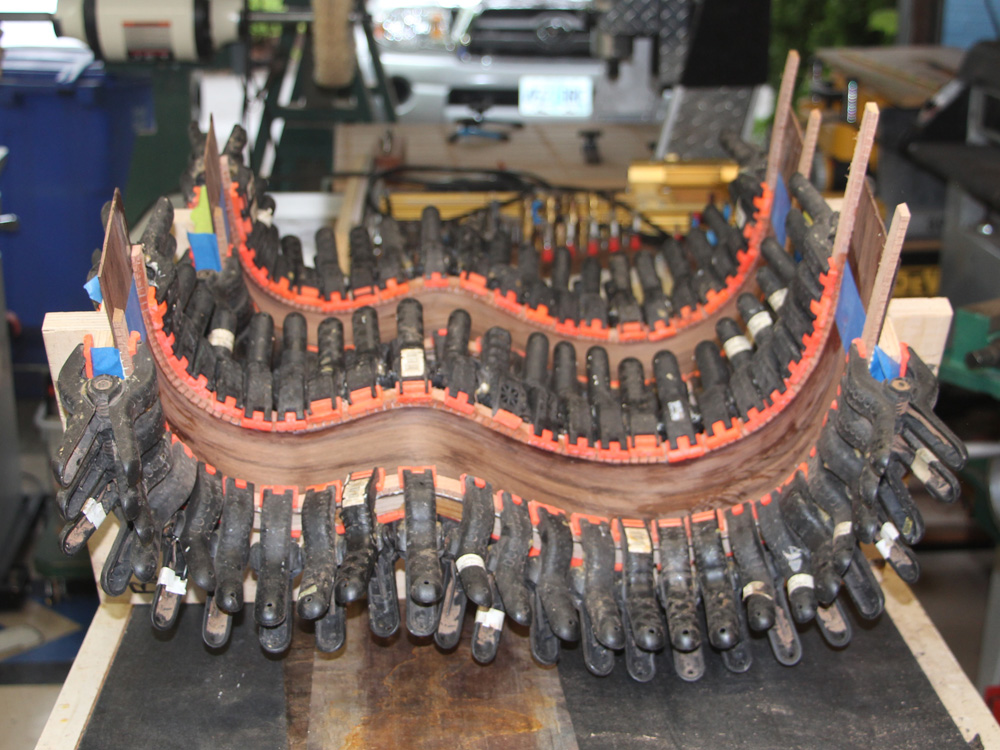
After cooking it on a low heat and letting the wood fully set up I have a nicey shaped piece of wood.
 ( 012 ) 17-June-2014
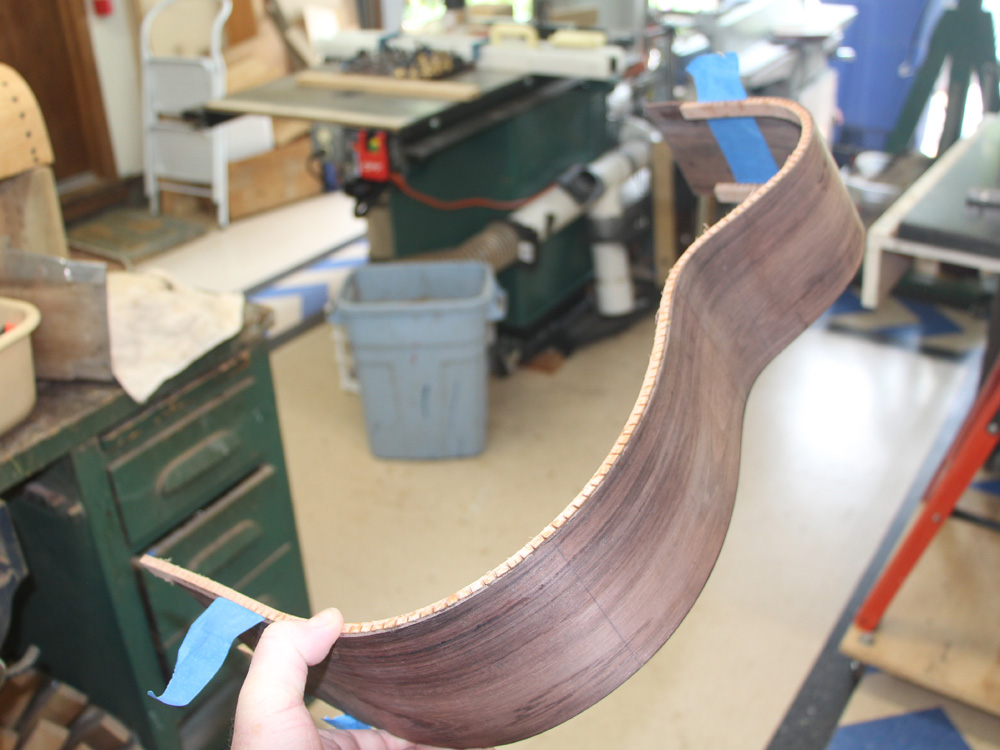
For the time being it goes into the form.
 ( 013 ) 17-June-2014
The second side gets the same treatment.
 ( 014 ) 17-June-2014
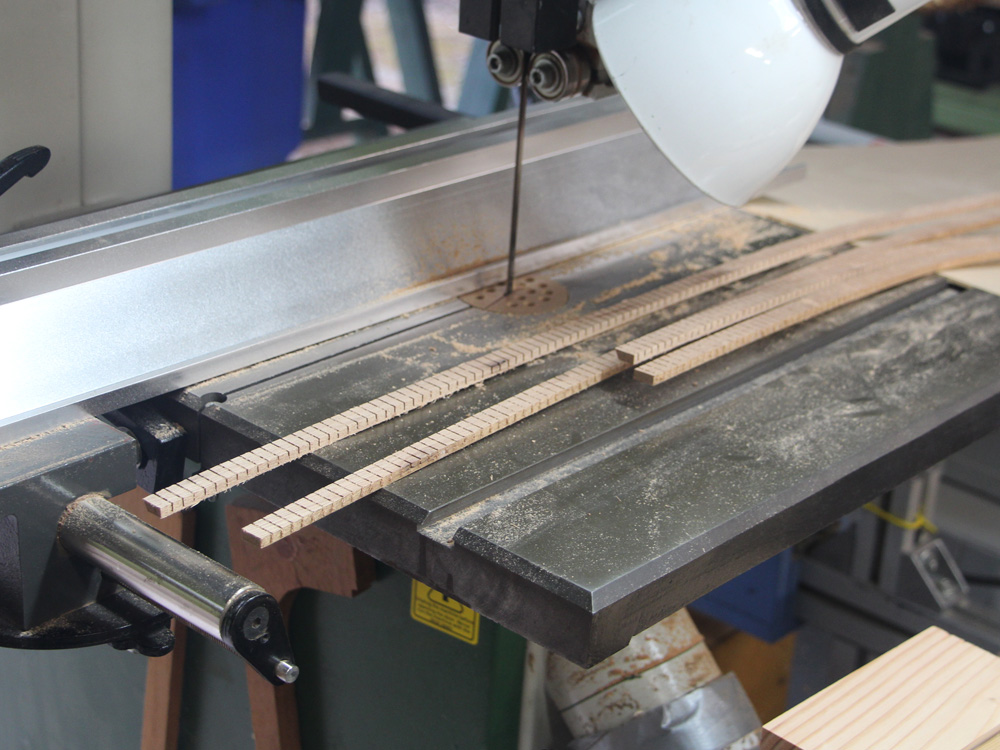
Here I am preparing the kerfing, using the band saw.
 ( 015 ) 17-June-2014
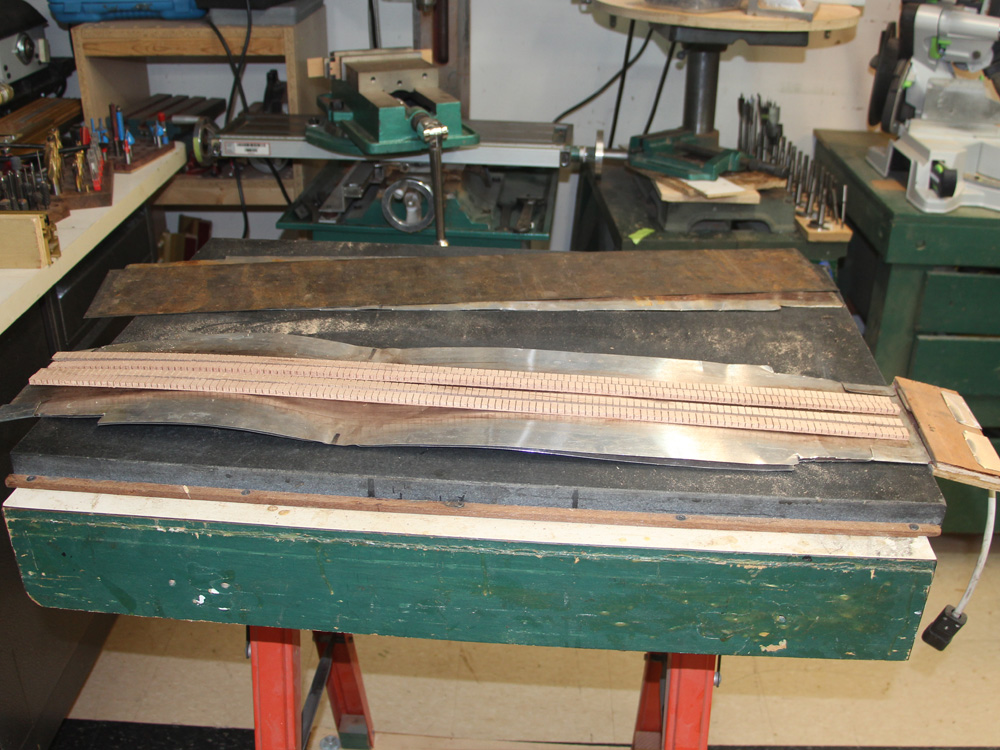
To mount it without breaking it the kerfing needs to have roughly the shape as the sides, so I use the bending machine to do this.
 ( 016 ) 17-June-2014
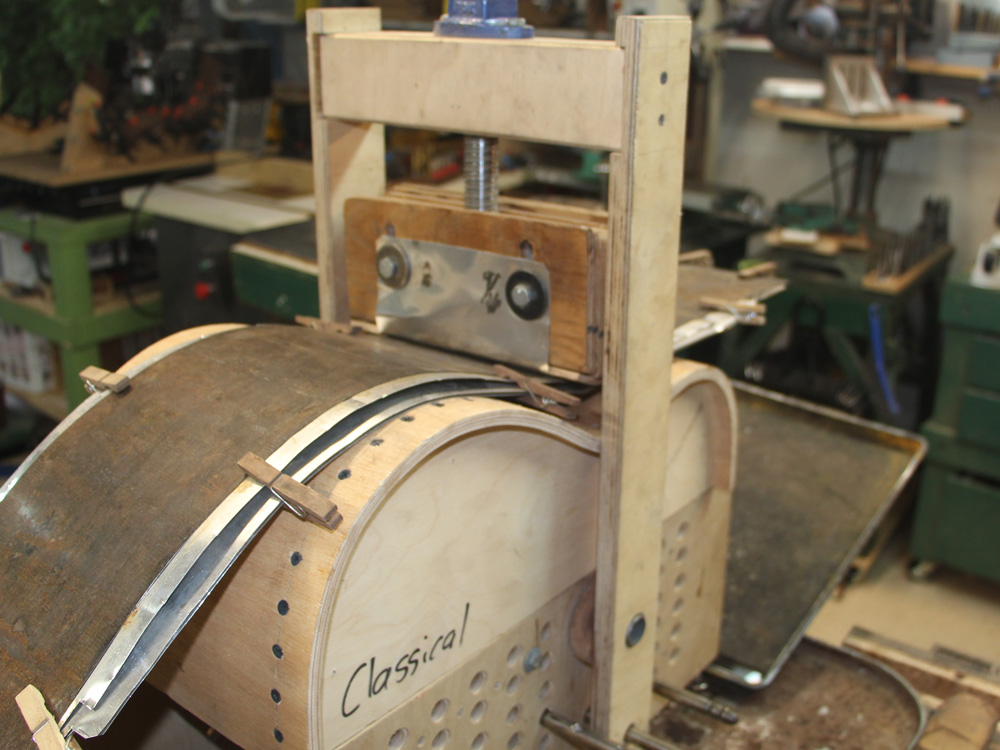
Into the heating blanket.
 ( 017 ) 17-June-2014
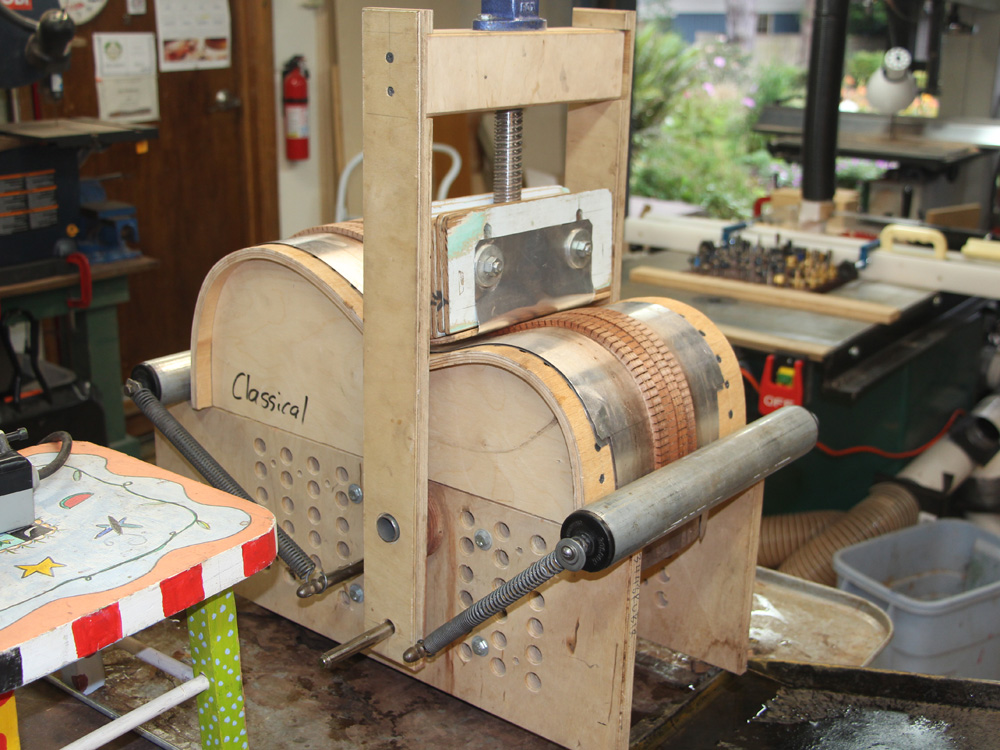
And it gets cooked until it sets up.
 ( 018 ) 17-June-2014
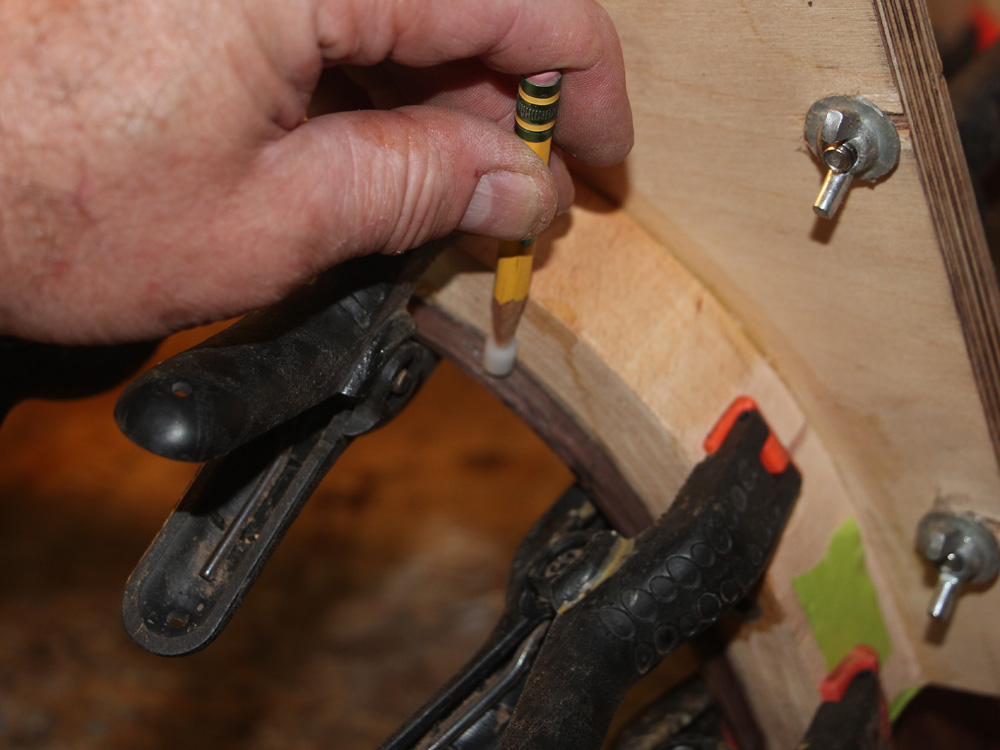
Now, with the sides in their forms I mark the shape of the form on the side blanks.
 ( 019 ) 17-June-2014
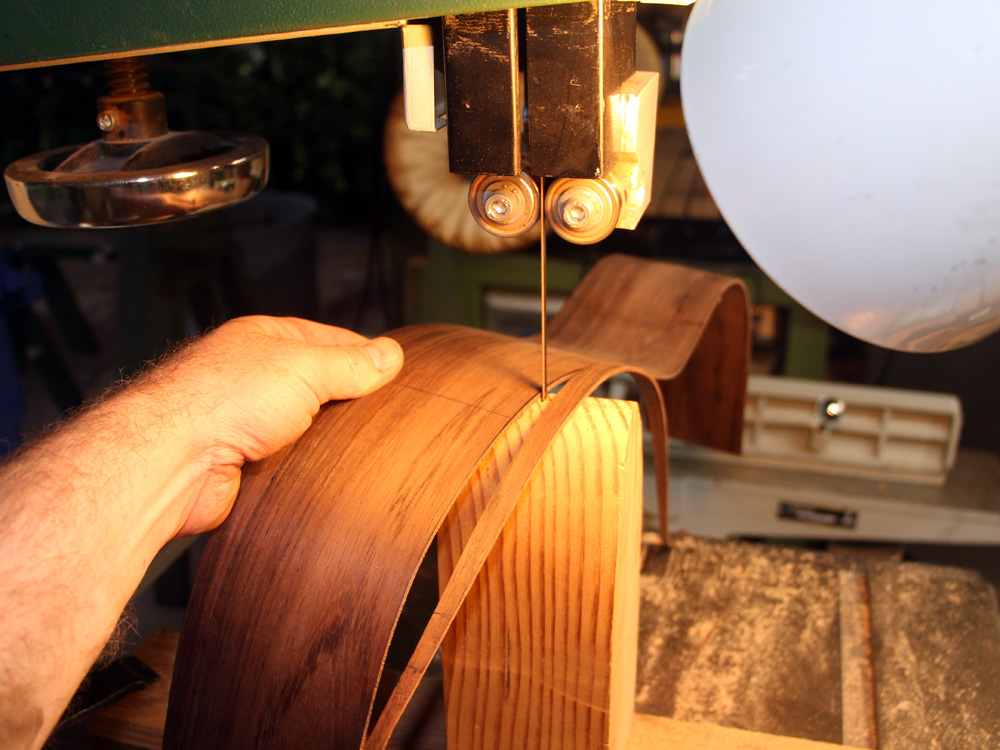
And I use my band saw with a raised platten the cut out the side piece.
 ( 020 ) 17-June-2014
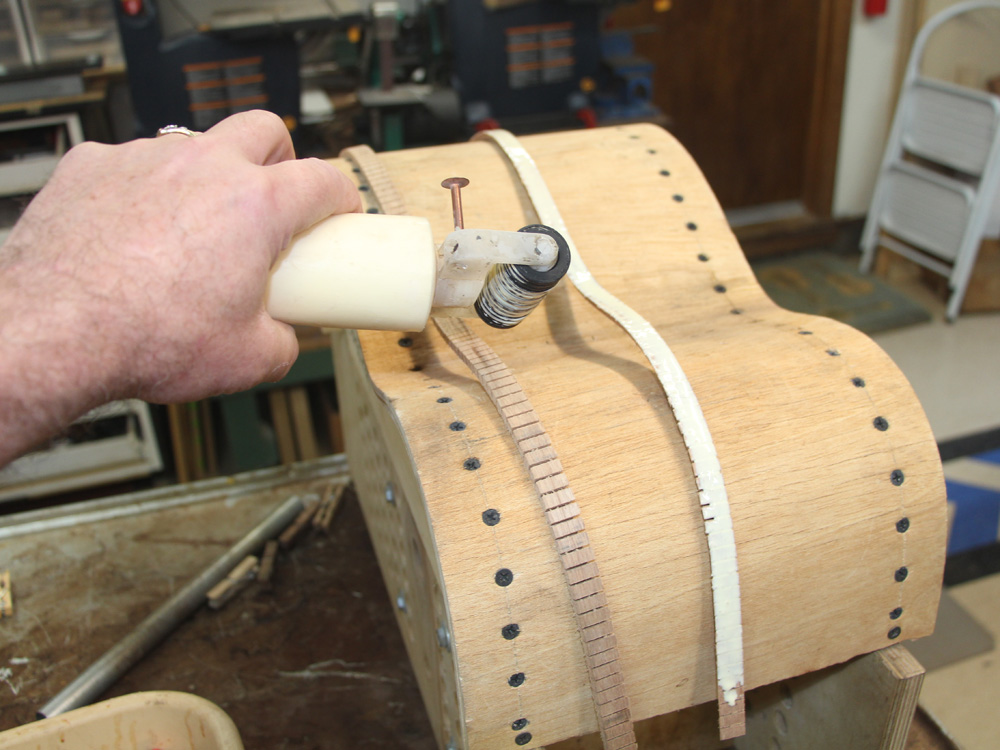
I apply a bit of glue to the kerfing.
 ( 021 ) 17-June-2014
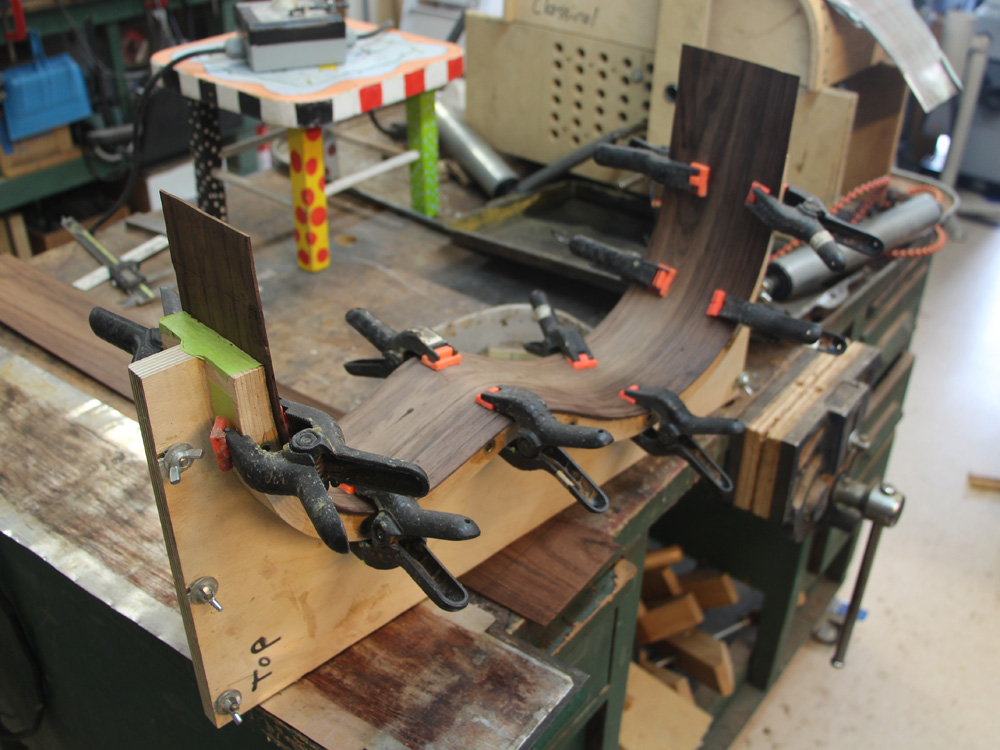
And start to glue it in place with a few clamps.
 ( 022 ) 17-June-2014
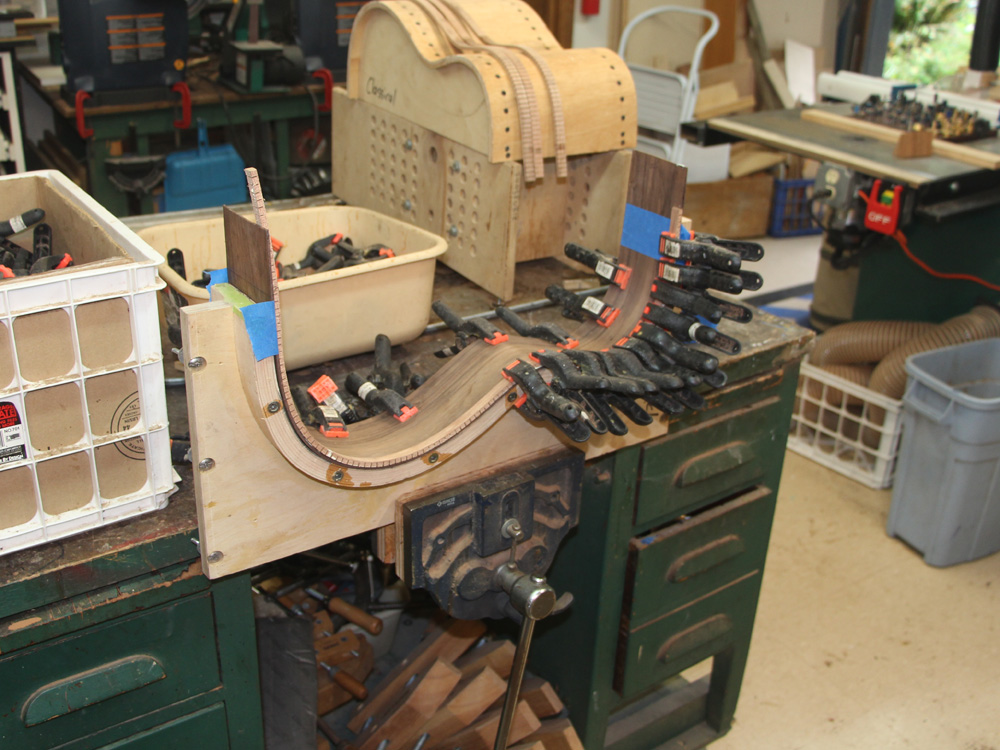
And a few more clamps.
 ( 023 ) 17-June-2014
And some more.
 ( 024 ) 17-June-2014
Did I say I ave a lot of clamps?
 ( 025 ) 17-June-2014
After the glue has set, the side comes out of the form and since I use a reversed kerfing scheme it is stiff and holds the shape of the form well.
 ( 026 ) 17-June-2014
I use a hand saw to trim off the ends.
 ( 027 ) 17-June-2014
 ( 028 ) 17-June-2014
 ( 029 ) 17-June-2014
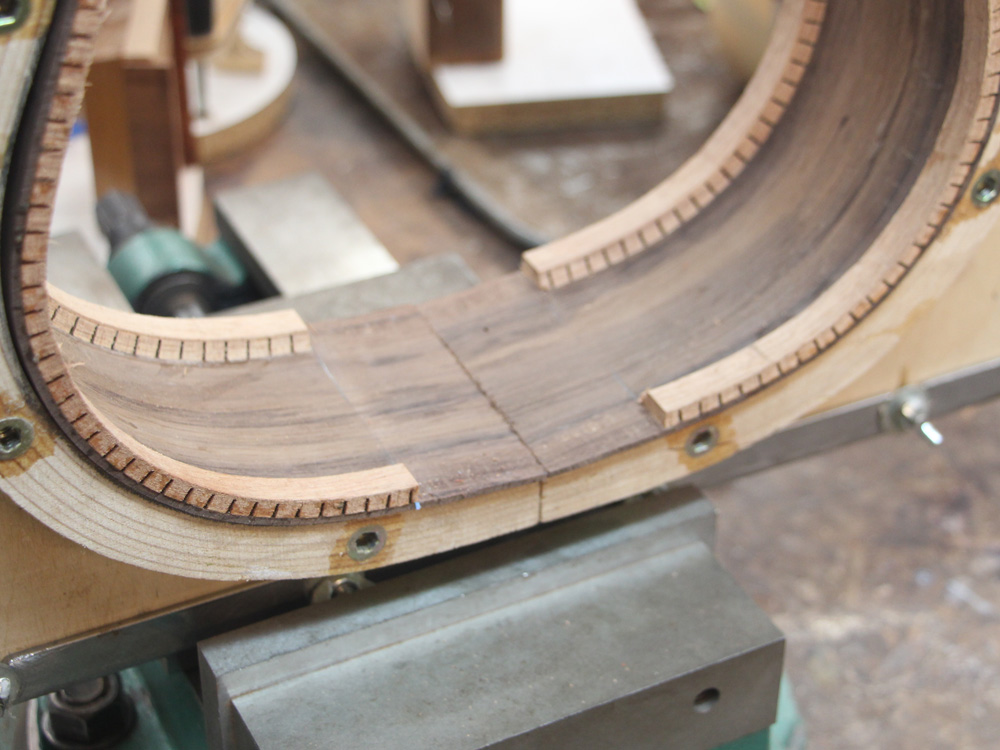
This is is a good time to clean up and sand smooth the kerfing.
 ( 030 ) 17-June-2014
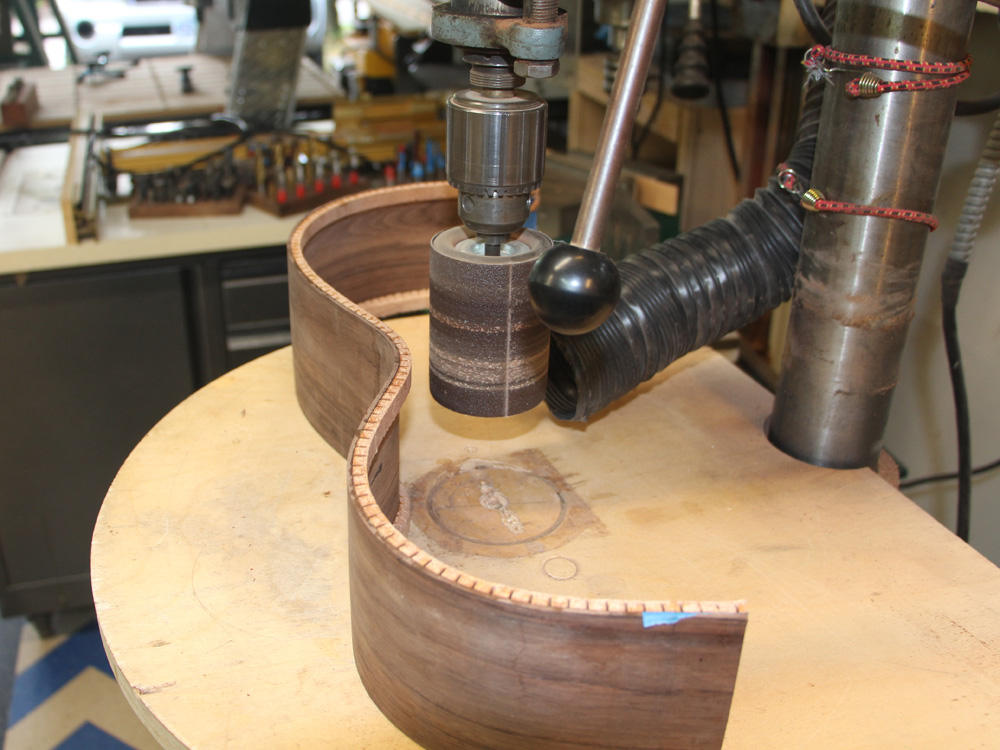
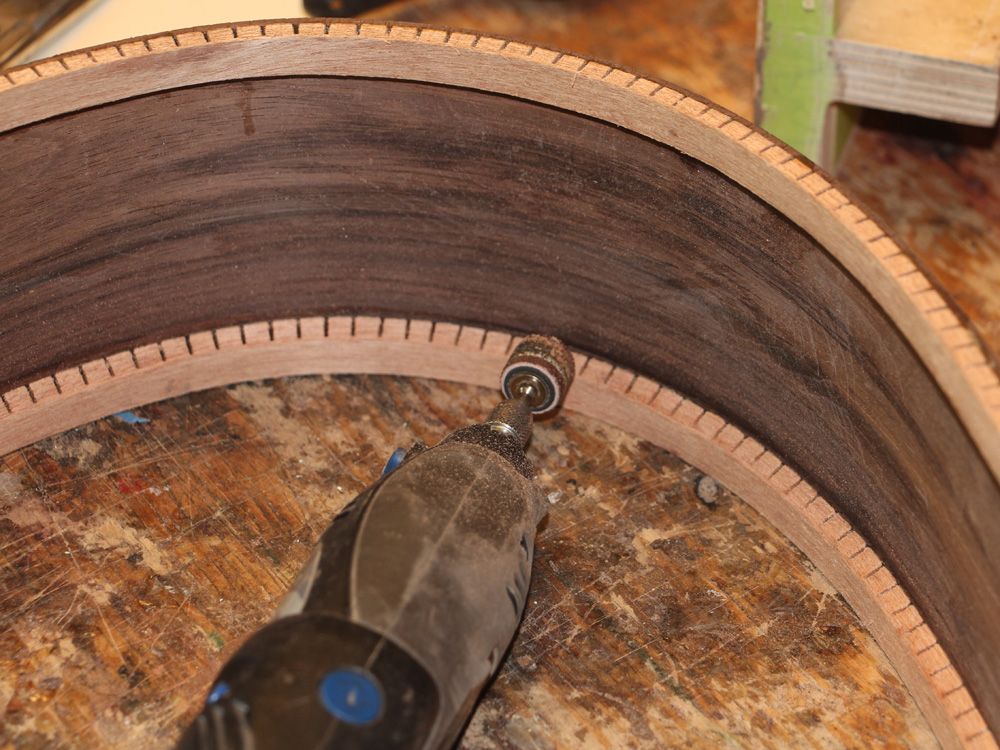
I use a dreml tool to sand the bevel.
 ( 031 ) 17-June-2014
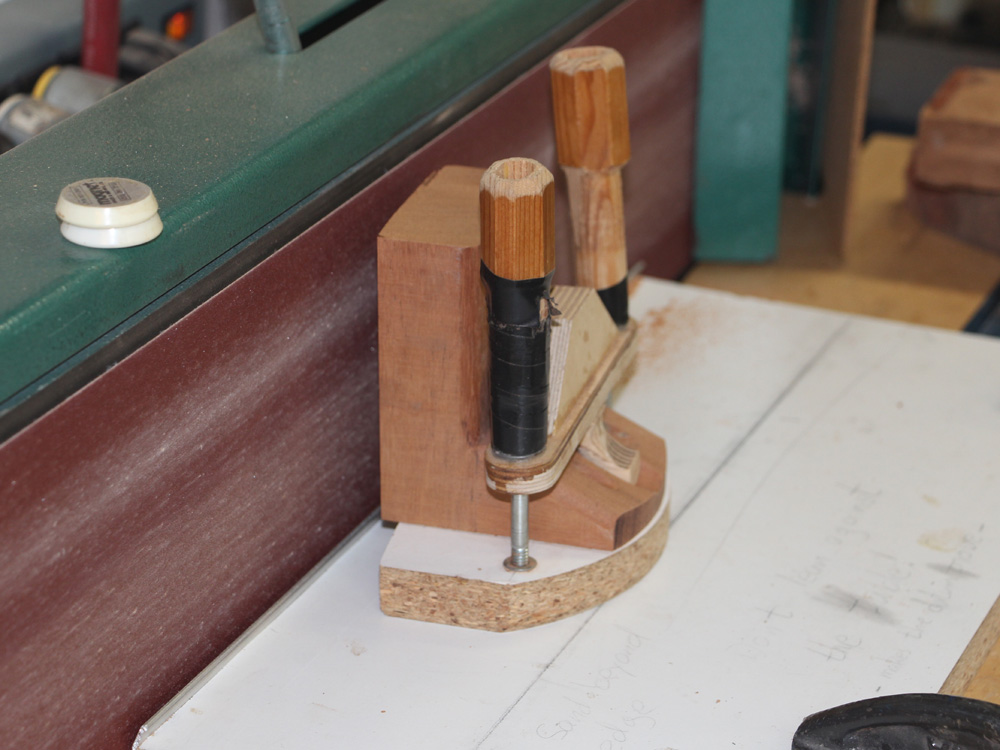
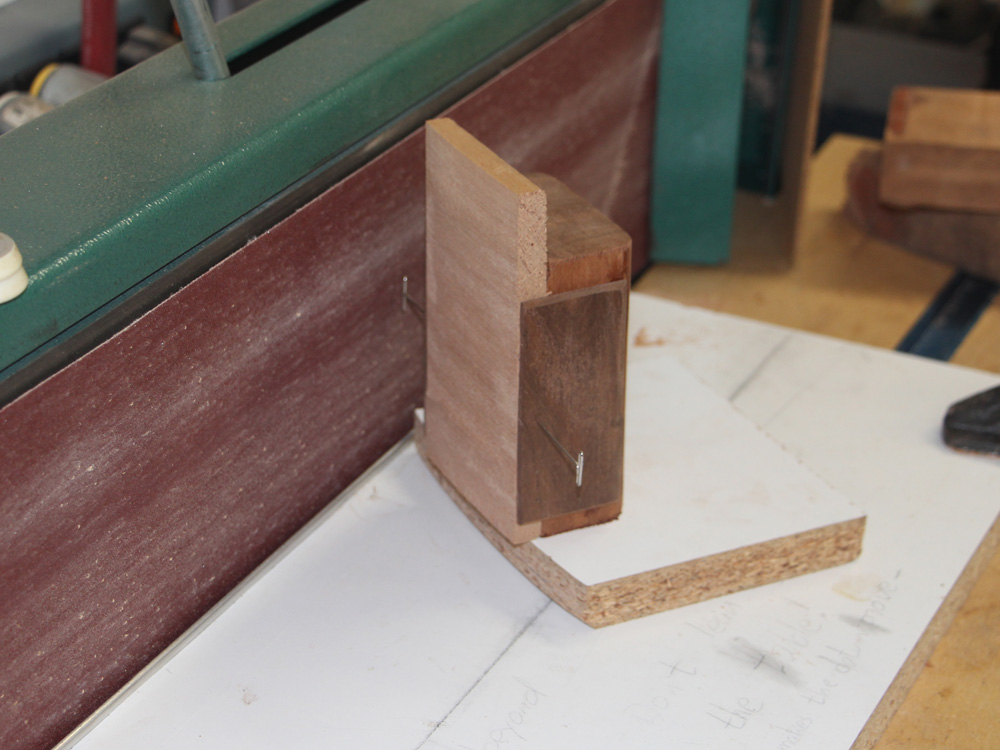
This is a picture of the template guide I use to shape the back side of the heel block to the curve of the guitar sides. The white template the heel block is bolted to has the same shape as the sides. The white plate below has a rim that sits close to the sanding belt. As it is sanded, the heel block then follows the template shape.
 ( 032 ) 17-June-2014
The tail block gets the same treatment.
 ( 033 ) 17-June-2014
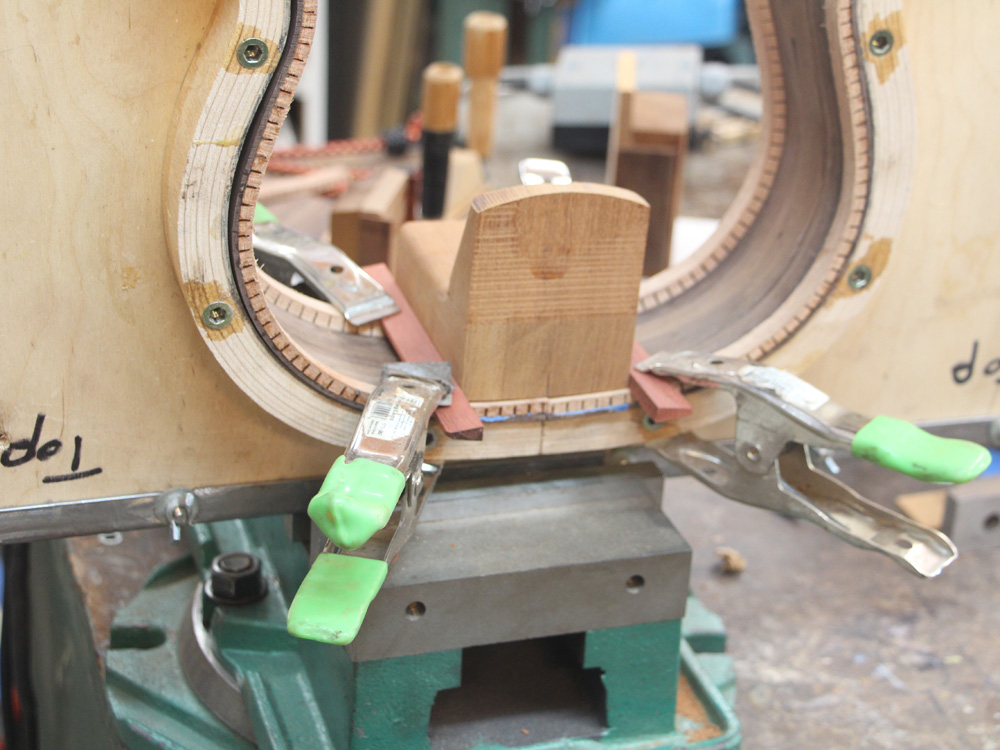
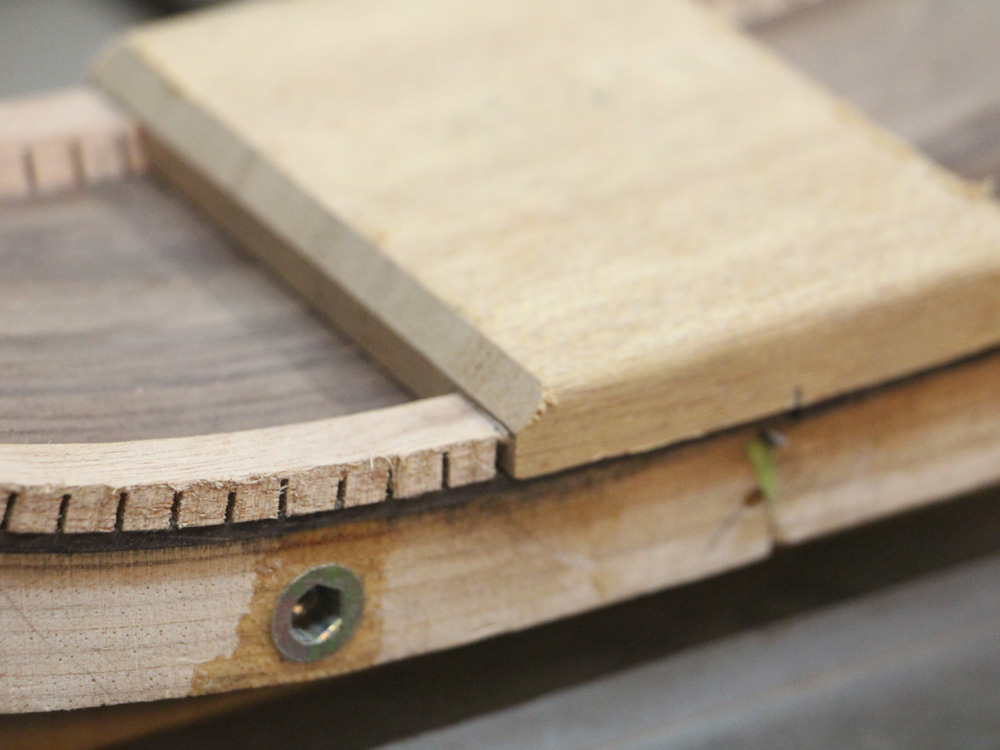
Now the heel block will fit snugly against the sides when it is glued in. The kerfing has to be removed first though. Here I have set up to guide strips after positioning the heel block on the sides.
 ( 034 ) 17-June-2014
I remove the heel block.
 ( 035 ) 17-June-2014
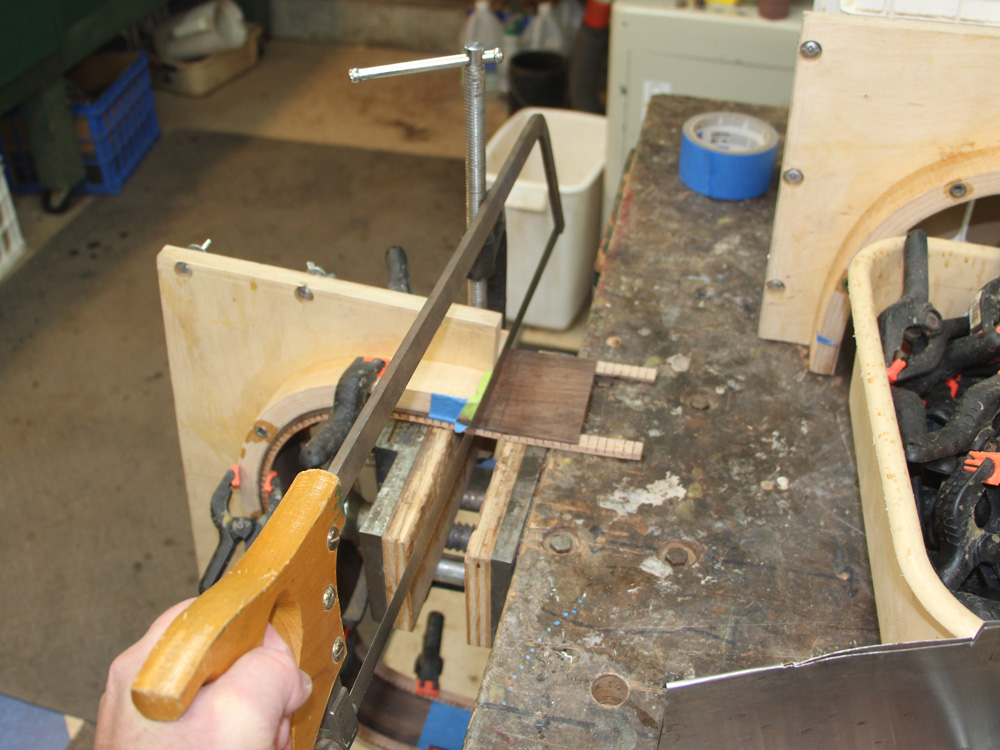
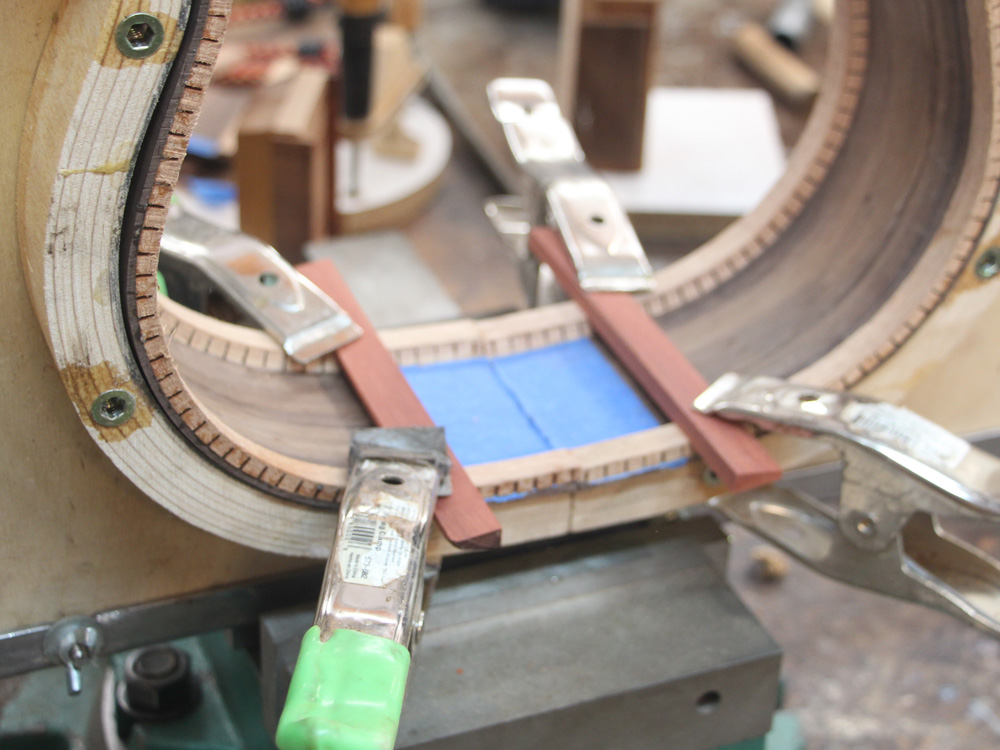
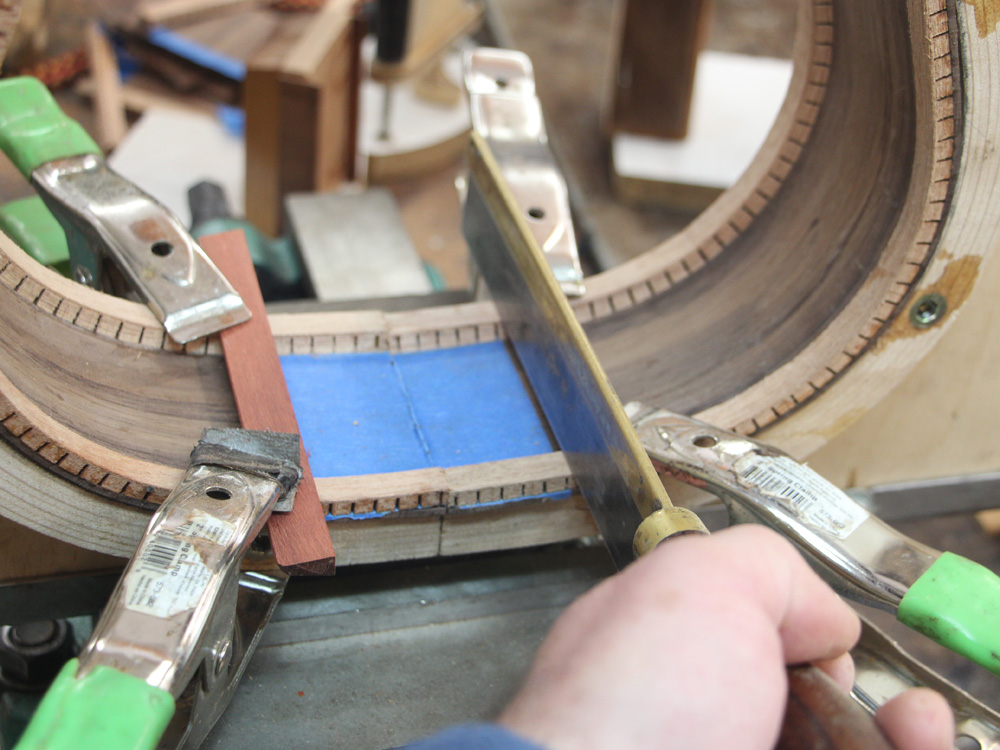
And then use a small saw to carefuly cut away the kerfing. The blue tape prevented the kerfig from being glued to the sides in this area.
 ( 036 ) 17-June-2014
The heel block will now perfectly fit into the slot.
 ( 037 ) 17-June-2014
And the tail block.
 ( 038 ) 17-June-2014
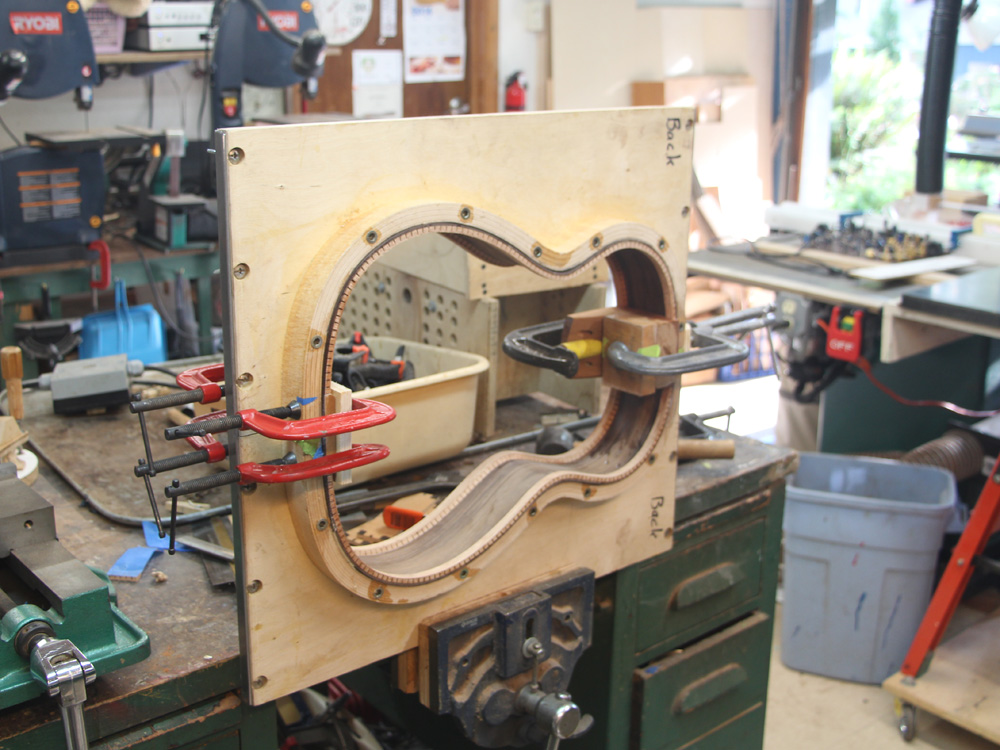
Now I use a few more clamps to press the heel and tail blocks into place as they glue the sides together.
 ( 039 ) 17-June-2014
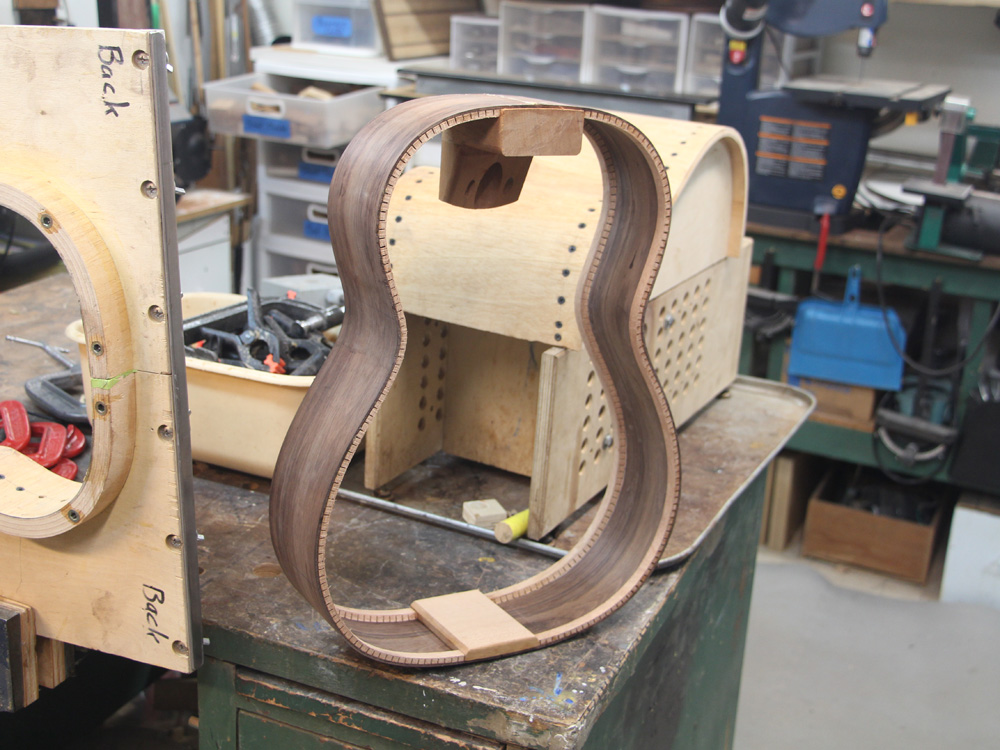
And we have our guitar rim.